Tutorial: Continuous integration (Jenkins) with intaQt
In this tutorial, we’ll show you how to incorporate intaQt® into the Jenkins continuous integration framework. Try our sample project out for yourself and see how easy it is to further automate your testing!

This tutorial will show you how to use the Jenkins continuous integration (CI) system to run intaQt® test cases within a CI environment. A Jenkins Server manages build projects, which are executed on the Jenkins build agents.
This tutorial assumes that you know how to use intaQt client®. If you have not used intaQt client® before, please see our intaQt client® tutorial. This tutorial also assumes that you are familiar with the basics of version control (e.g. Git or Subversion).
Required QiTASC products
The following products must be installed and running using the QiTASC Cockpit in order to run intaQt test cases via Jenkins:
- intaQt® – should be running on a remote machine
- intaQt client® – must be the same version as for intaQt®
Infrastructure and prerequisites
In addition to the above QiTASC products, the following must be set up and running:
- All Jenkins build agents must have intaQt client® installed: Test cases will be executed via intaQt client® on another remote machine where intaQt® is running.
- A Jenkins CI environment (a Jenkins server and optional Jenkins build agents). If using a Jenkins Agent, intaQt client® must also be installed on the Agent (the same version as intaQt®).
- An intaQt® project that is under version control.
Admin access to Jenkins server is necessary to make the steps in the tutorial.
Note: There is always a Jenkins Server and there are always Jenkins Build Agents, however a Jenkins Server can also be used as a build agent.
Configure and start intaQt on the remote machine
Configuration
Add the following configuration block into the Server.conf, which is located in QiTASC/intaqt/config:
Intact2ApiAdapter = {
  adapterPort: 36012
}
This means that intaQt®’s API Adapter is configured to listen on port 36012.
Start intaQt on the remote machine
To start intaQt® from the command line, navigate to the QiTASC directory on your remote machine. Then enter the following commands:
Windows Users
qitasc start intaqtLinux and Mac OS users
./qitasc start intaqtNote: It is a good practice to reserve an intaQt® license exclusively for Jenkins usage. This is to avoid conflicts in case non-CI projects also need to be run.
Configure and run Jenkins
Now that you have set up your intaQt client® project, you can configure Jenkins so that it will run the intaQt® project build.
Add environment variables on the Jenkins server
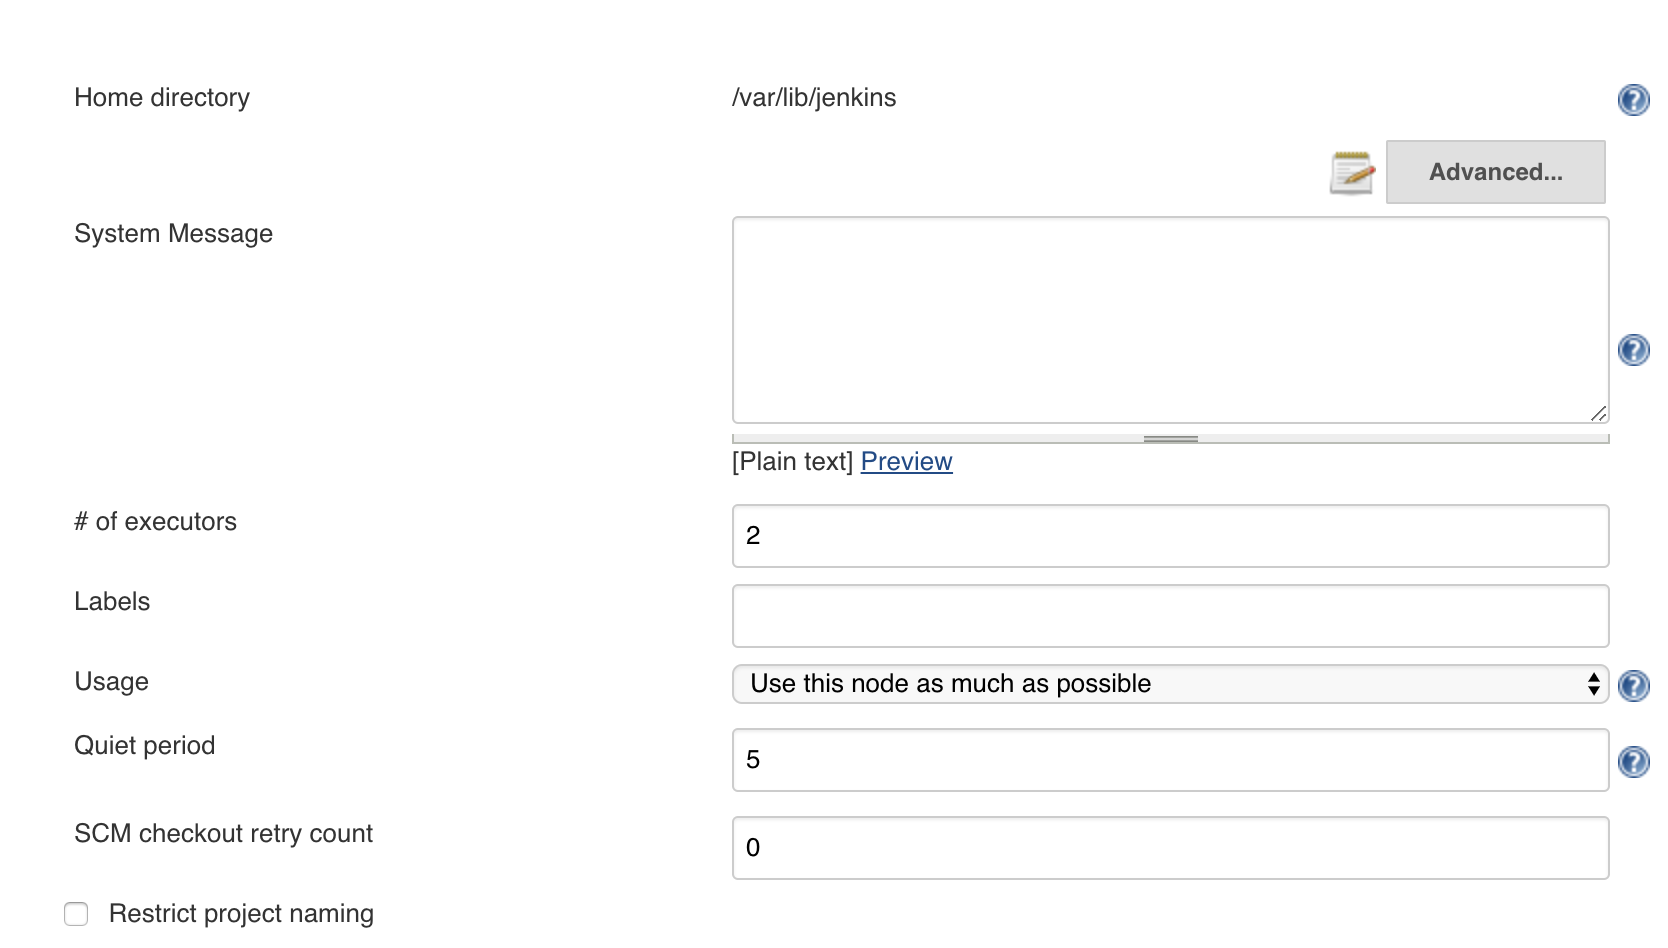
Next we’ll configure three global environment variables so that intaQt® and Jenkins can communicate with each other. Select Manage Jenkins from the left-hand menu, then select Configure System. You should see a view that looks like this:
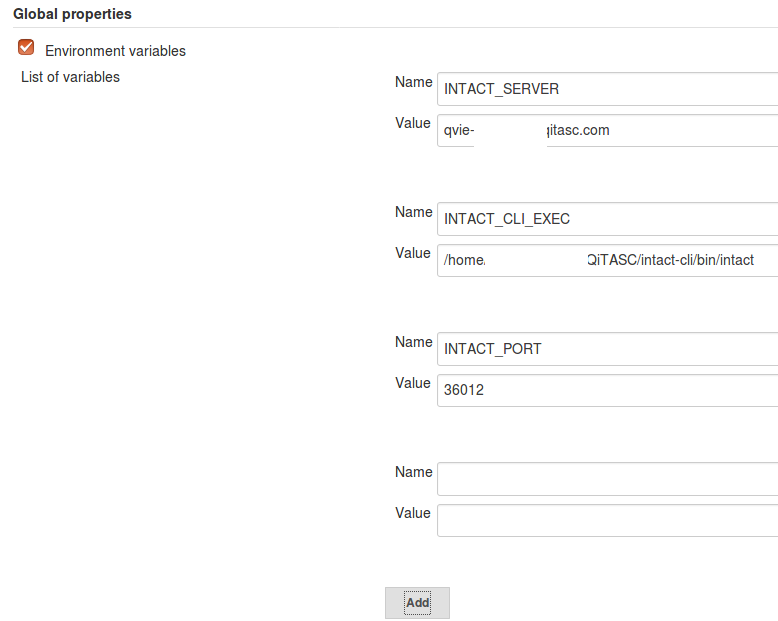
Scroll down until you reach a section called Global properties. This is where you will configure your environment variables.
Define an environment variable for each one of the following:
INTAQT_SERVER– intaQt® hostname.INTAQT_CLI_EXEC– Location of the intaQt client® on the agent.- When there is more than one Jenkins agents, intaQt client® must be installed in the same location as each Jenkins agent.
INTAQT_PORTintaQt® port, which should be36012, unless configured otherwise when creating your project.
Example
Create a new build project
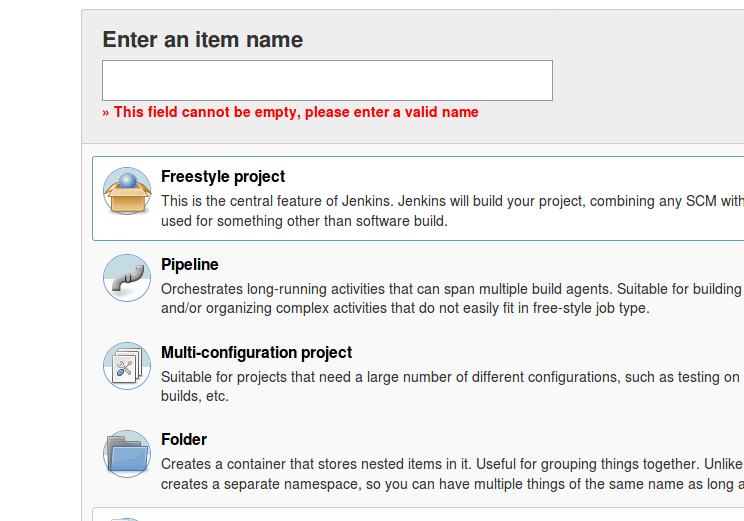
Select New Item from the left-hand menu then click Freestyle project:
Assign the project a name of your choice, then scroll to the bottom of the page and click OK.
Configure the source code management
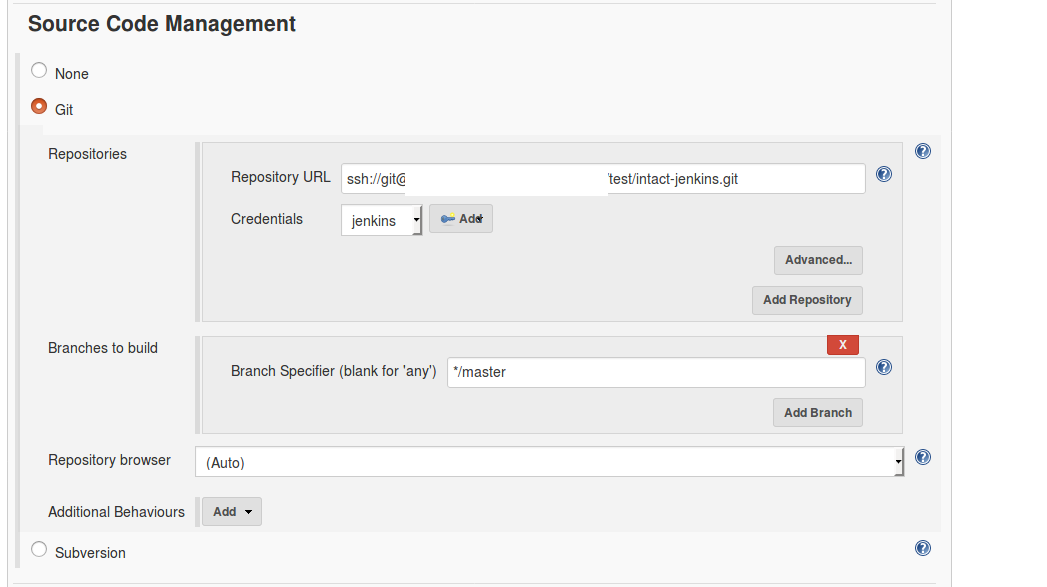
After assigning your project a name and clicking OK, the following view should appear:
Select the Source Code Management tab. Here, you will need to configure the version control tools you are using for your project. If you are not sure what to put here, contact your administrator. Whether using Git or Subversion, select jenkins from the Credentials menu.
Configure the build environment
Scroll down and click the Delete workspace before build starts box:
Configure build
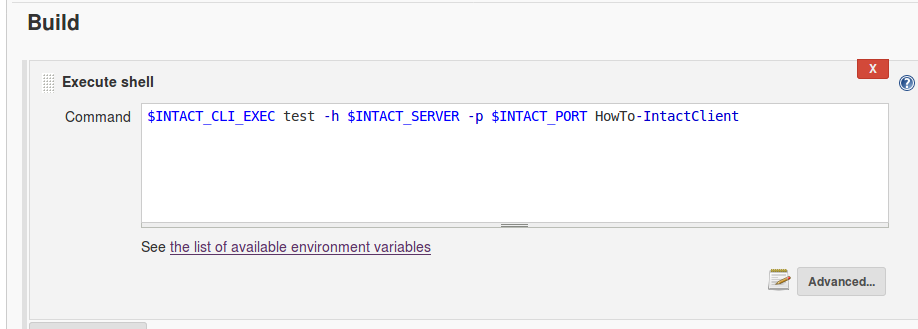
In the Build section, select the type of step you’ll use to run the build. For this example, we’ll use a Linux agent and choose Execute shell, then enter the following command into the text box:
$INTAQT_CLI_EXEC test -h $INTAQT_SERVER -p $INTAQT_PORT HowTo-IntaqtClientIf you have already used our intaQt client® Tutorial to execute features on a remote host, or used intaQt client®, then the syntax may look familiar to you. The only difference is that we are using environment variables to represent parameters:
- The host, indicated by
-h, which we configured with the environment variableINTAQT_SERVERabove. - The port, indicated by
p, which we configured with the environment variableINTAQT_PORTabove. - Additionally, the folder where intaQt® Feature Files are specified as
HowTo-IntaqtClient.
When executing the same project via intaQt client®, the syntax would look like:
./intaqt test -h qvie-peter.qvie.qitasc.com -p 36012 HowTo-IntaqtClientConfigure post-build actions
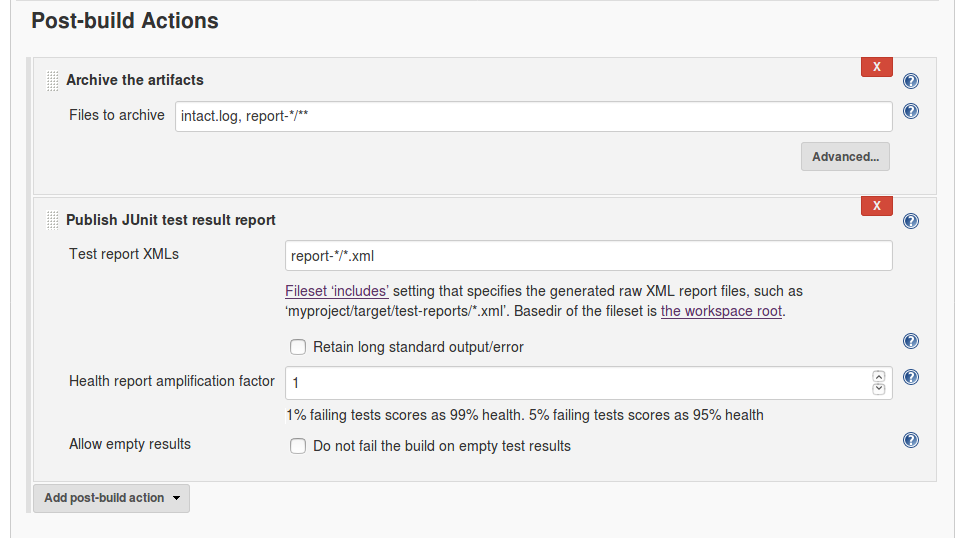
Finally, we’ll add two post-build actions:
- Archive the artifacts
- Publish JUnit test result report
Archive the artifacts
First, we want to store intaQt client®’s intaqt.log file for each run, as well as its report folder. Select Archive the Artifacts option from the Post-build action menu, and enter the following into the Files to archive field:
intaqt.log, report-*/**Publish JUnit test result report
Second, select Publish JUnit test result report from the Add post-build action menu and enter the following into the Test reports XMLs field:
report-*/**.xmlRun the Jenkins build
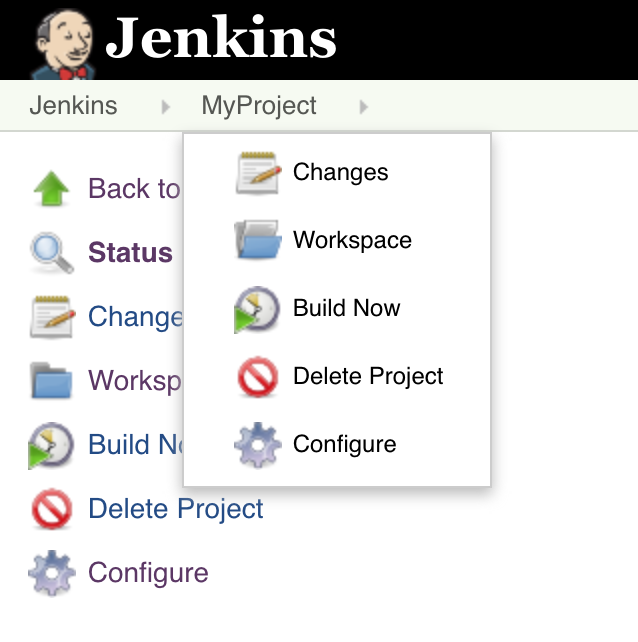
Select Build Now from the drop-down menu containing your project’s name. In our case, the project name is MyProject:
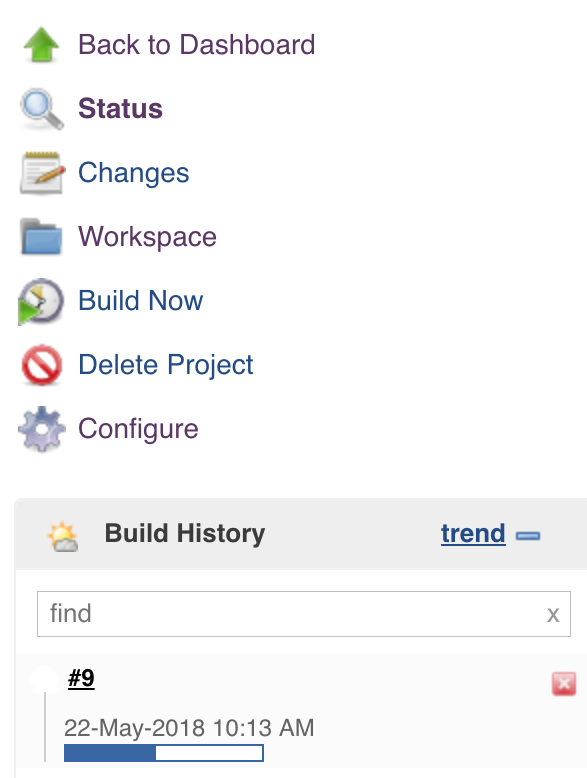
A status bar will appear – This shows that your project is being executed:
Check build results
There are a few ways to check your projects’ results. Clicking on the build number, for example, #9 in the example above, is a simple approach. Alternately, you can go to the Jenkins Dashboard and see a list of all projects:
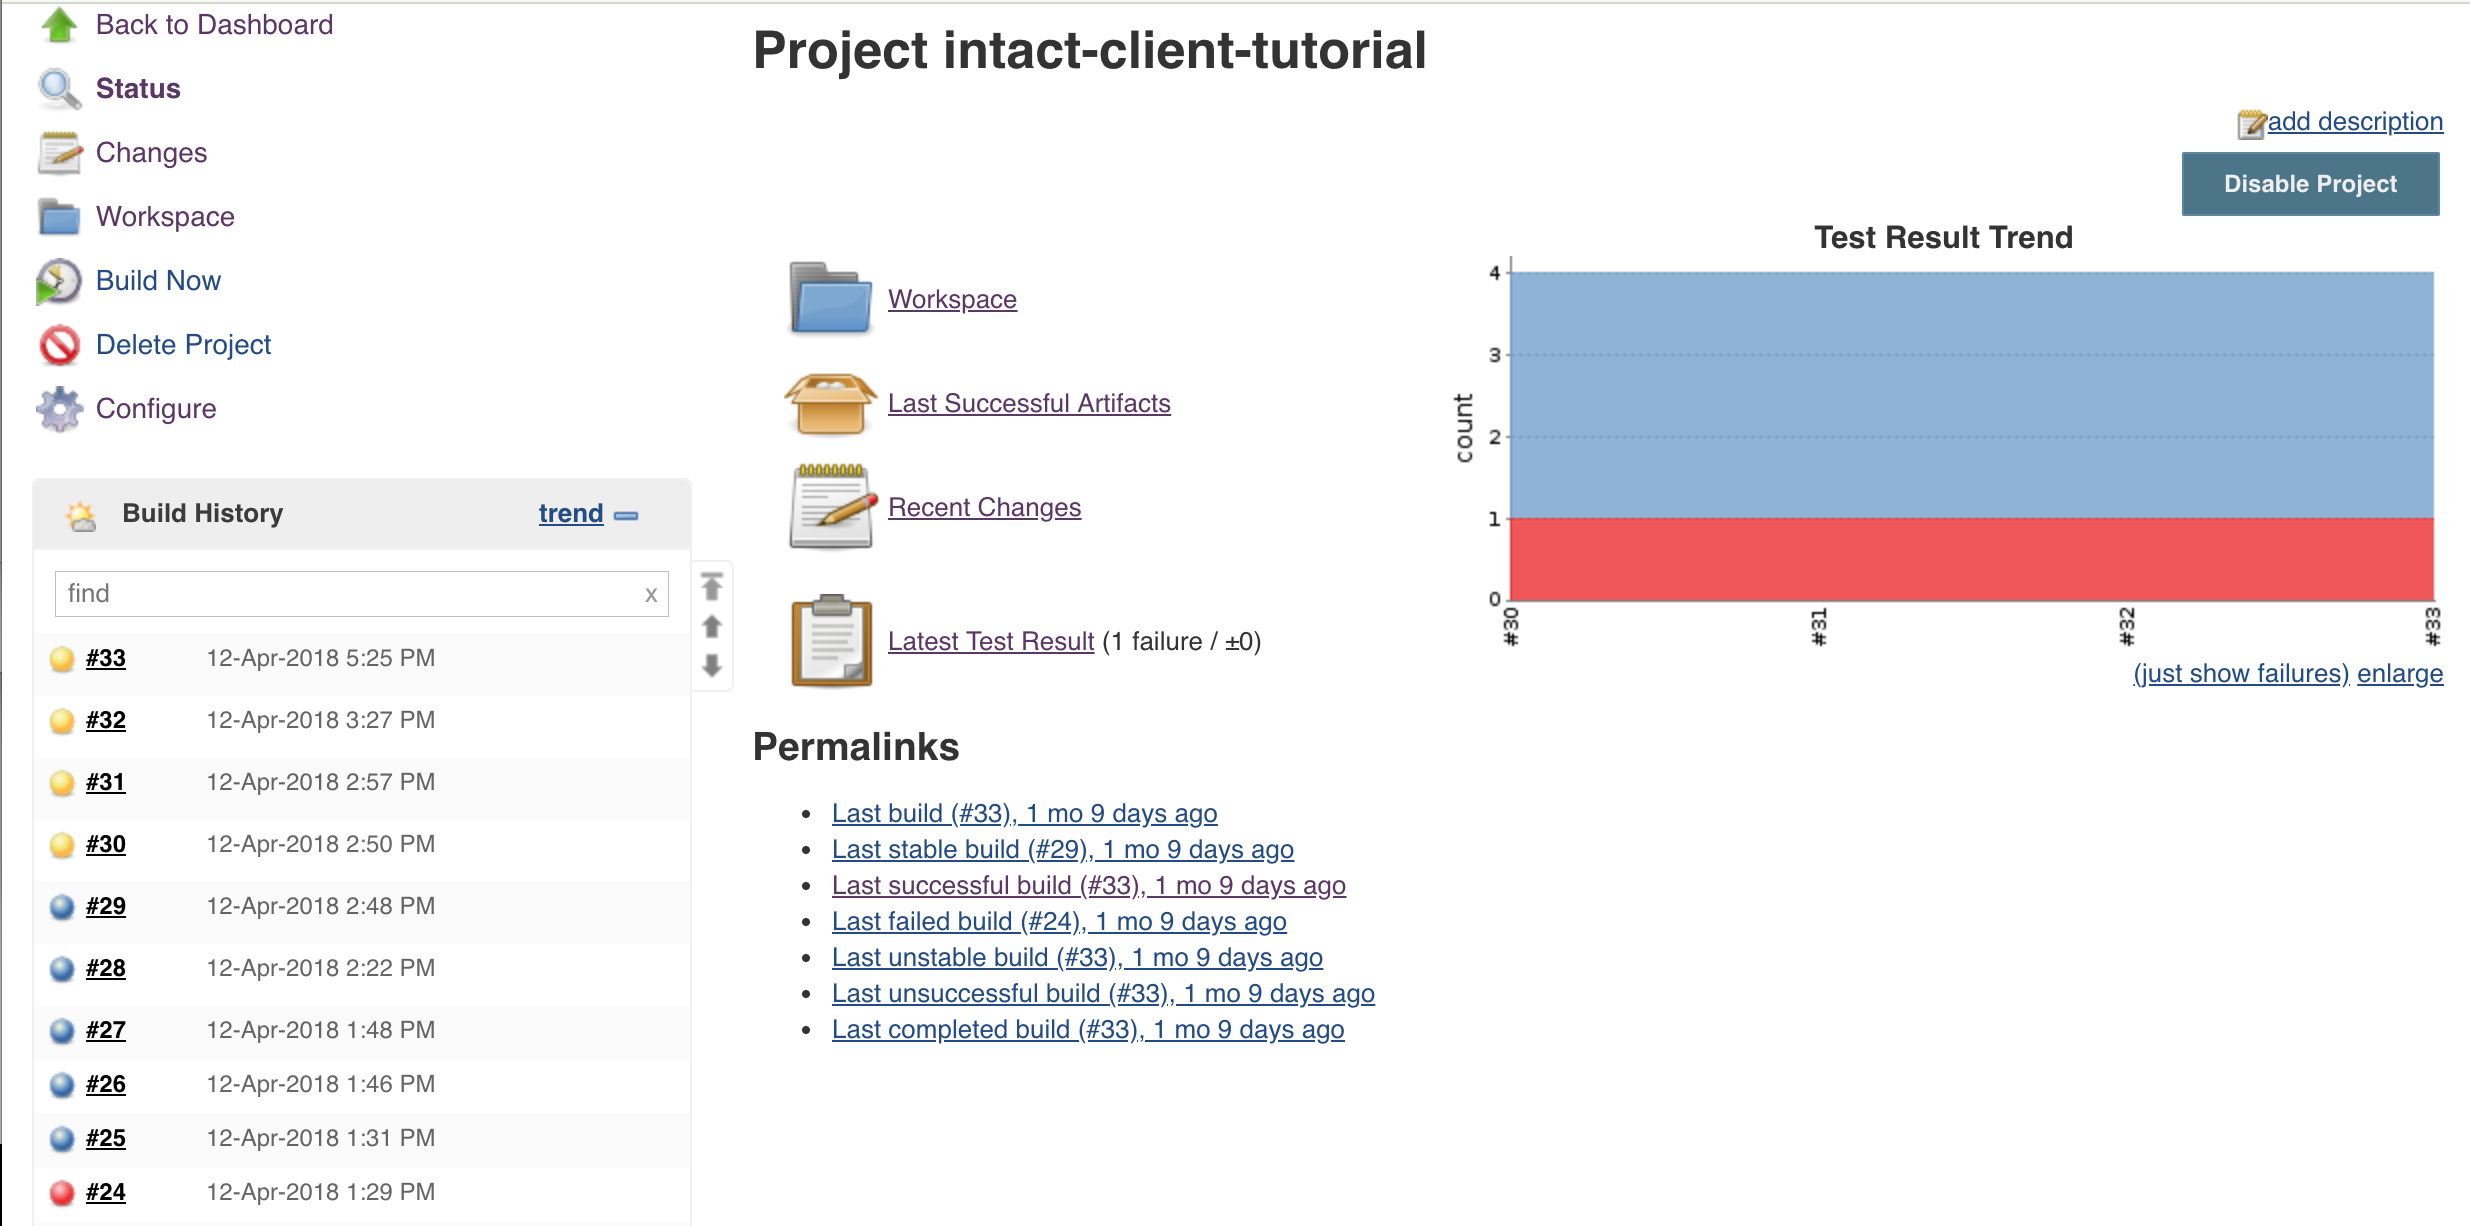
Clicking on a project brings up a summary/dashboard:
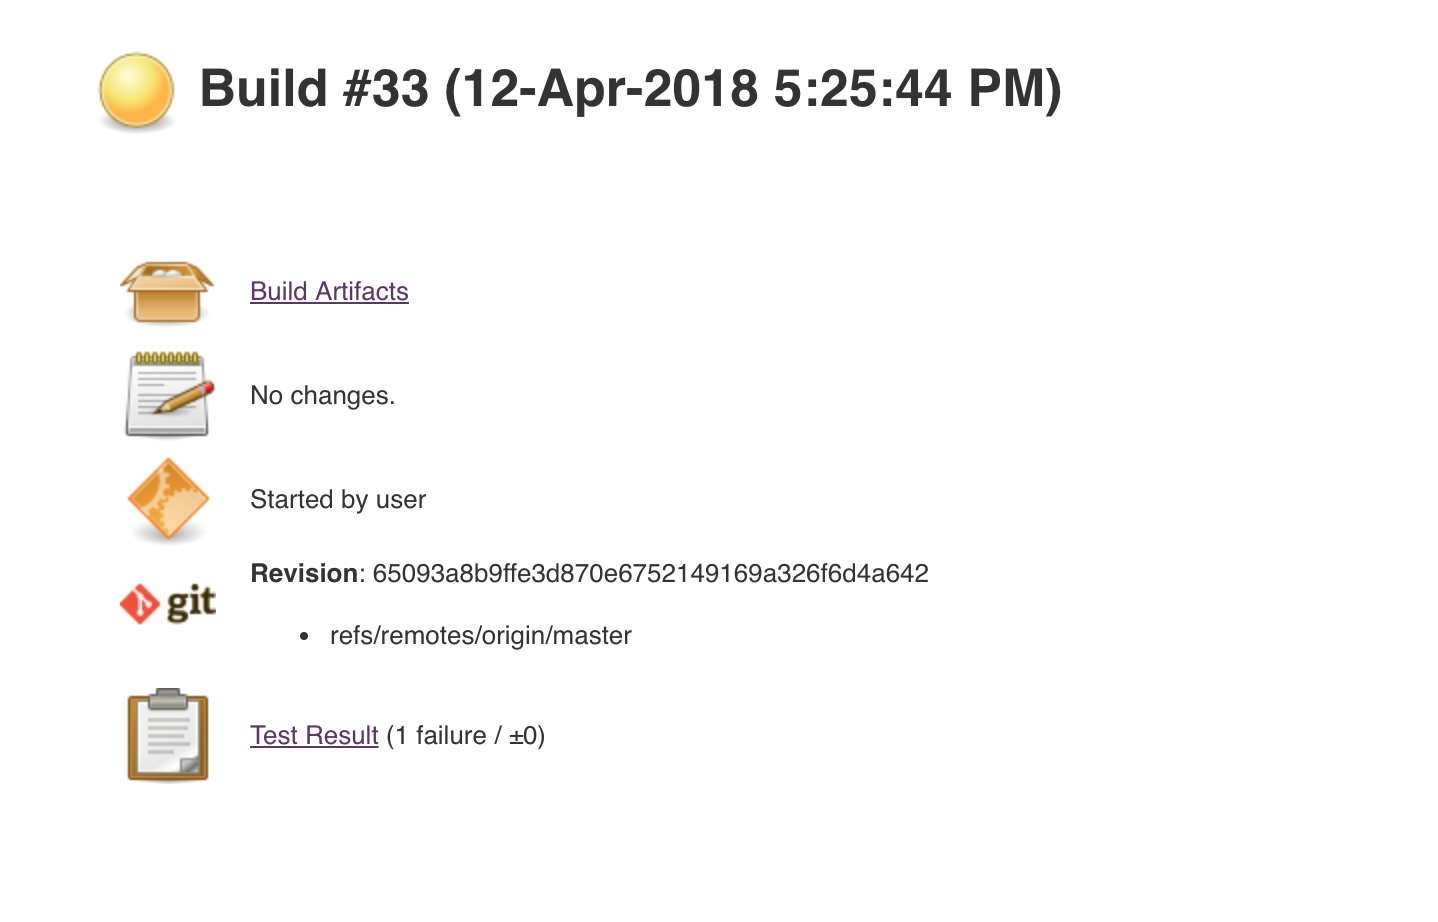
We’ll select Last successful build, which brings up the following page:
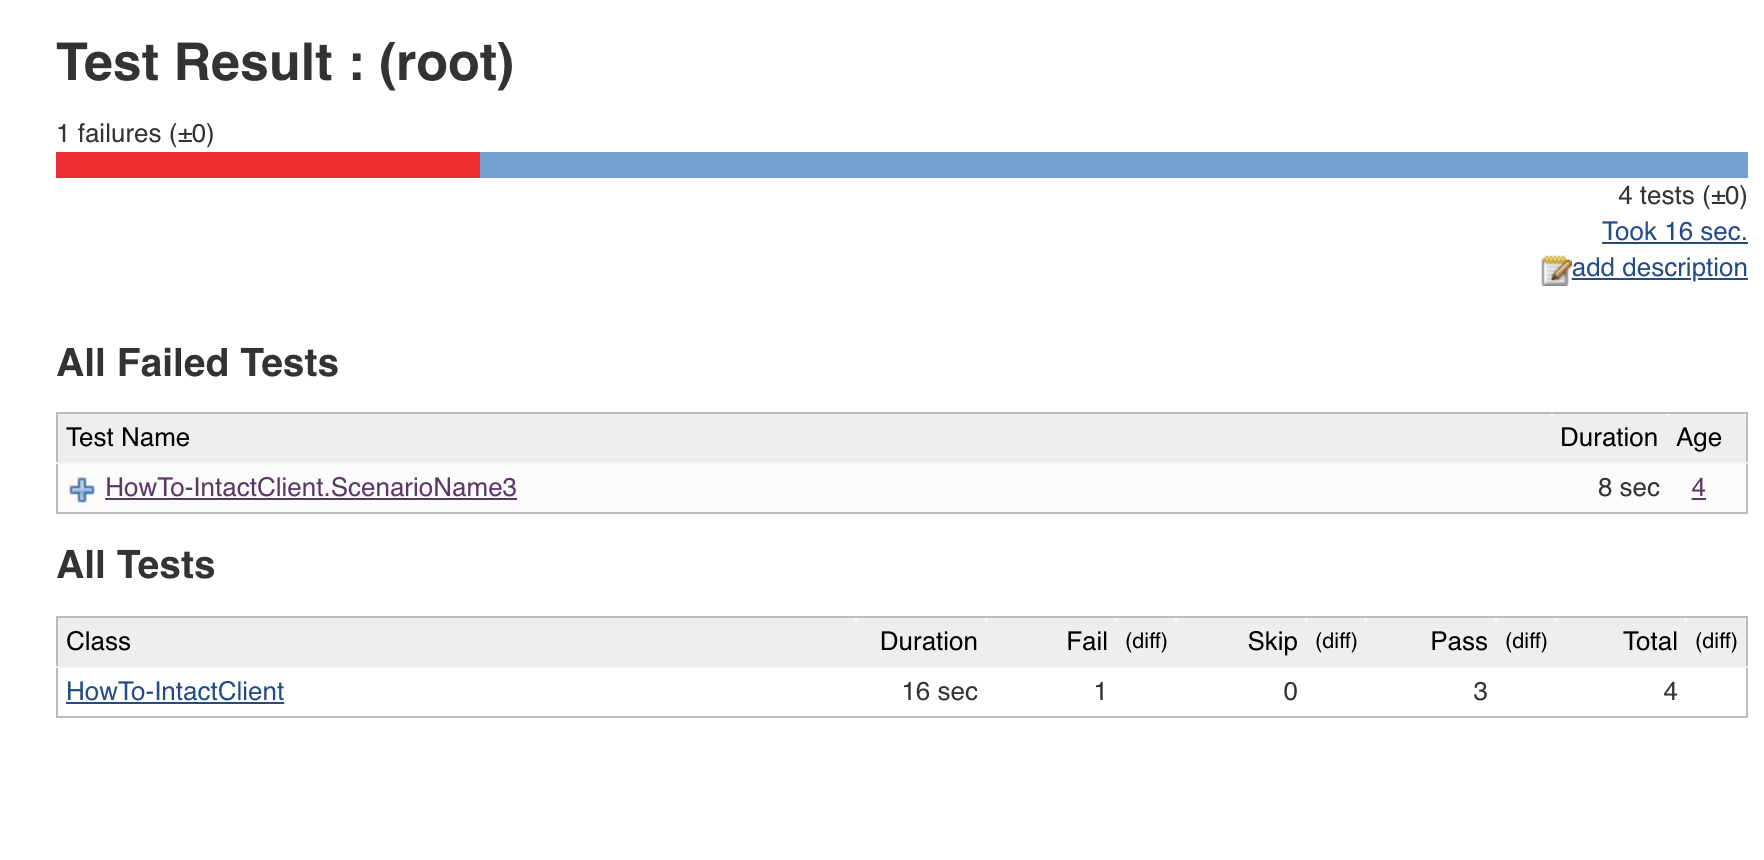
Clicking on Test Result gives a quick overview of what happened during the build:
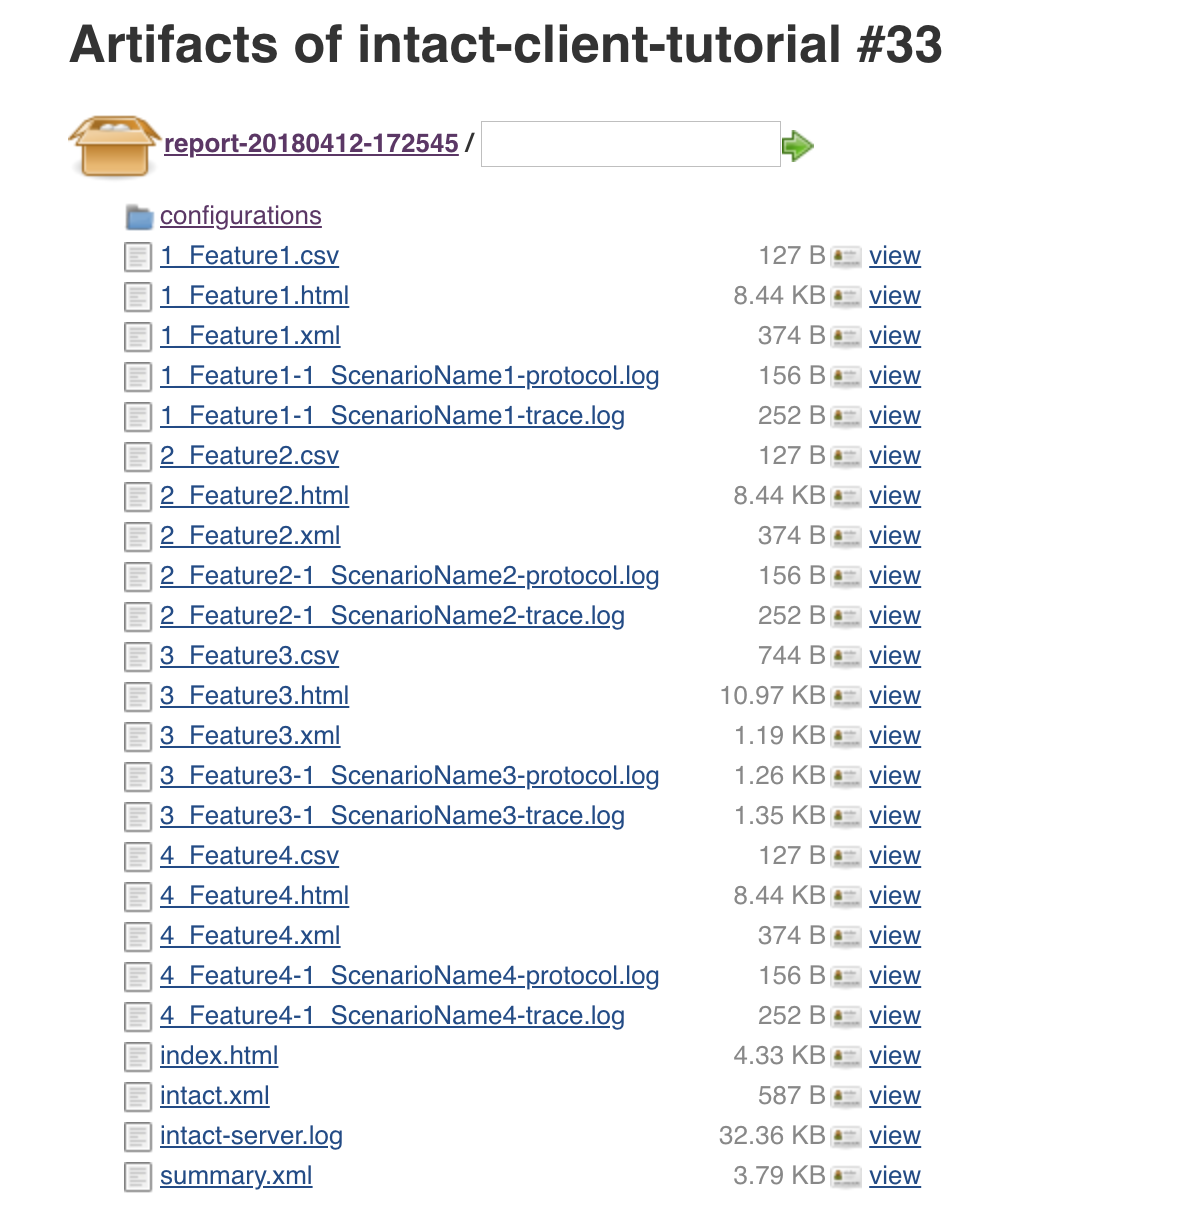
Alternately, we can go back to our project view and click on Build Artifacts, which provides a list of items created during the execution:
These artifacts are the same items that you would find in your projects’ reports folder. If we click on the report-20180412-172545 folder, we’ll see the following list of artifacts:
Click on the index.html report to see an overview of the results.
Conclusion
In this tutorial, we showed you how to integrate intaQt® into a Jenkins continuous integration environment. After demonstrating the basic project configurations, we provided a quick summary of the various ways you can examine the test results. The Jenkins User Documentation is a great source of reference materials, including tutorials and use cases.


